Saturday, December 16, 2017

'Adore' with Boho

Hi everyone. Today I thought I'd create a quick everyday card in the middle of the silly season as there are still many birthdays and special occasions to celebrate during this time.
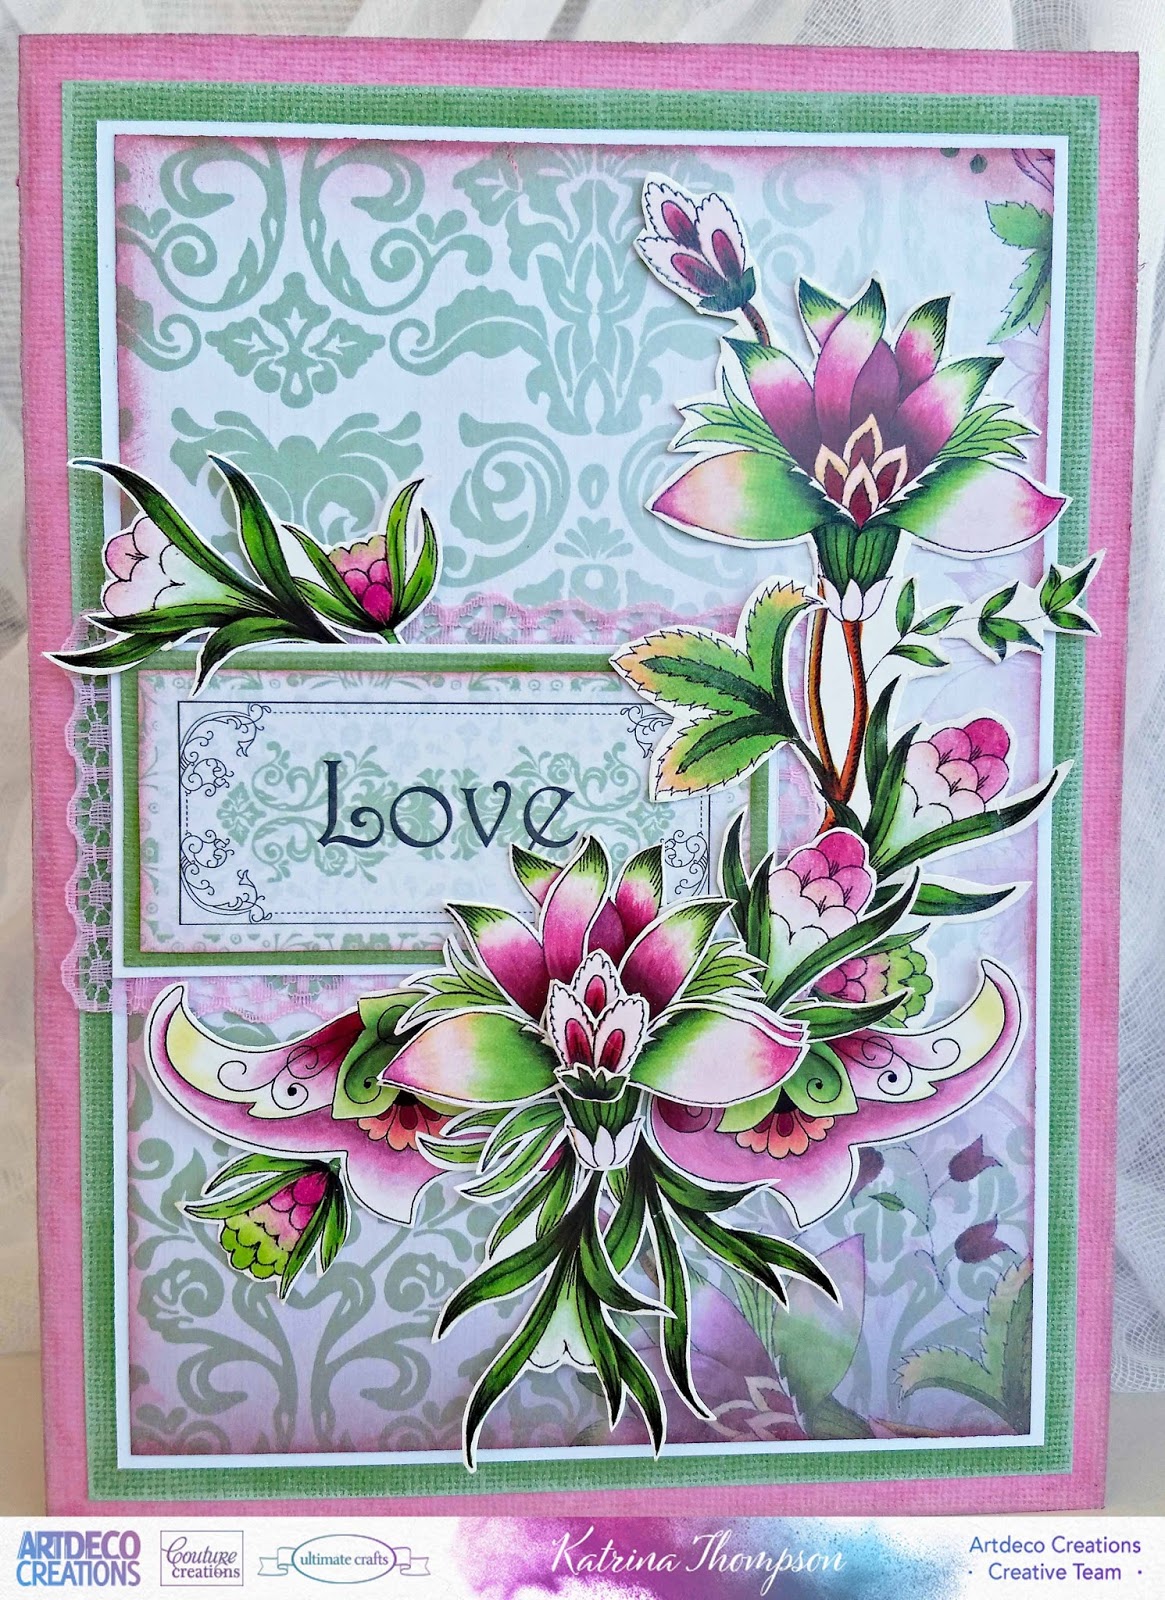
I have used just one sheet from the Bohemian Bouquet Collection with a few of the new chipboard pieces from Couture Creations new range. We'll make our own shimmer spray and add some sparkle to someones day.


This whole card is created with just one sheet.
A step card shows off the features of the floral designs. You can create any kind of step you wish.
As pictured, cut out a selection of flowers and leaves to decorate with.
Ink lightly around all the edges to blend.
 
 I wanted the chipboard to be muted and blended, so no priming, just ink directly onto the chipboard with a coordinating ink. A little soaks in and acts more like a stain.
 
Attach your chipboard as pictured and arrange your flowers and foliage to suit. Layer, tuck and weave some of the pieces to create some interest.
 
With the shimmer spray your cage will look even more textured.
Place a dash of the Pearl White Mix and Match Pigment Powder into a spray bottle and add water. Shake well and your ready to add a beautiful pearlescent shimmer to your projects. 
It will be a trail as to how much shimmer you want. I start with a scoop about as large as a 10cent piece. Always start with a small amount and add more powder to increase the shimmer. 
Pop a few of the Adhesive Gemstones onto the flower centres and the top of the birdcage to complete.
Thankyou for looking!
 
Products used to complete this project.
Bohemian Bouquet Collection
 
Couture Creations Brands
 
Until next time Happy Creating!! K x


Tuesday, December 12, 2017

Christmas Card with Katrina Thompson

Hi Everyone. The festive season is upon us and time is of the essence, so what better than a simple and quick card idea. With just a few pieces we can put together an effective card in 10 minutes.
You don't have to just make this card for Christmas though, some of the design elements in the Let Every Day be Christmas collection would also make beautiful everyday cards for those with other December events.


Team the Christmas Baroque Background die in Ivory, with 4 pieces from the Ephemera Set.
 
Create a finished card base 5 x 7 inches from the Snow White Card base.
Cut a coloured mat, 4 x 5.75 inches from the Battle Fatigue card stock.
 
Attach the mat to the centre of the white base and the die cut is then centered onto the mat.
You could also use the Die Cut and Bond when cutting your die shape, which will allow you to stick it to the mat easily.
 
Attach the 2 Ephemera strips as pictured. Having a contrast in colour gives the card a lift and picks up on the subtle hints of colour in the tips of the flower buds.
 
Attach the Ephemera flower with 3d.
Attach the sentiment in 3d as pictured, or another greeting if you have another purpose for your card.
 
and you are done!!
 
 
Products Used to complete this card:
 
Let Every Day Be Christmas
Art Deco Creations
 
Until next time, Happy Creating!! Kx


Thursday, November 30, 2017

Love in Bloom

Hello everyone. Thankyou for joining with me for this tutorial showcasing the beautiful colours of the Bohemian Bouquet collection designed by Denise Boddey.
In previous posts I have highlighted the Blue and Yellow Butterfly embellishments teamed with the Decoupage sheets and for this project I have focussed on the pinks from the Decoupage sheets to create the lovely 3D blooms.
This is a large card and is assembled in 3 simple stages. The pictorial breaks down the sections. You could even use the same design on a scrapbook page and substitute the sentiment with a photo!


1. Creating your base
I have selected a portion from the 12x12 patterned papers as the background. This will give a subtle hint of the design in the background.
 
Create a card base from the Lollypop, (pink), 20.3cm high x 30cm wide. Score and fold.
Cut a mat from the Lush, (green), 19.1cm high x 13.7cm wide.
Cut a highlight mat from the Snow White,18.1cm high x 12.9cm wide.
Cut your patterned piece as pictured above, 17.7cm high x 12.5cm wide.
Ink the edges to coordinate.
 
Layer as pictured.
 
2. Arranging the Blooms
Pop the layered pieces from the decoupage sheet. Trim around the edges allowing a small white border on each piece.
 
Create the main flower with 3d between each layer.
 
I have done a mock layout of where each section will lay on the card.
 
Cut the love sentiment from the patterned papers. Ink in a coordinating colour. Cut a Lush green mat giving you a 2mm border around the sentiment, then layer onto a white highlight mat giving you a 1.5mm border. Combine the 3 layers.
 
Lay an edge of pink lace around the outer edge as pictured, creating a soft frame.
Tuck the decoupage foliage into the top corner as pictured, this will create balance with the layout.
 
3. Assemble
The sentiment will be the first placement on the card and the foliage can then be arranged around it.
 
 
Products used to complete this project:
 
Bohemian Bouquet Collection
Magnolia Lane Collection
Art Deco Creations
 
Thankyou for looking, until next time, Happy Creating!! K x


Saturday, November 25, 2017

Butterflies and Sunshine

Hello everyone and thankyou for joining with me today for my newest card project.
I have been creating with the Bohemian Bouquet collection, once again displaying the wonderful colour palettes from this collection.
Today I have selected the yellow butterflies as a focus, creating sets of simple layers using the 12x12 papers. These elements can be flipped to the reverse print, changed from portrait to landscape and just a simple movement of the focus piece to a different place on the card will give each card a fresh new look.  K x


Each of these cards are created from a white base 7x10 inches. When scored this makes a card 5x7 inches and gives you a nice amount of space to work in.

 
Card 1.
 
 
The simple movement of the butterfly will change the look of your card. See the photo above and below. Your options are endless!!


Cut a yellow patterned base 11.5cm x 16.5cm. Ink the edges and attach flat to white card.
Cut a flower pattern as pictured 10cm x 15cm. Ink edges and attach with 3d.
Cut part of the border strip with the text and a length of blue patterned print to match. Lay the blue behind the text to create a strip of blue across the top then attach the whole piece to a strip of lace.
Cut 2 flowers and 2 leaves and create 2 sets as pictured. Select 1 butterfly.
Follow the photos to attach your elements or create your own.

 
Card 2.
 
 
Cut a yellow patterned base 11.5cm x 16.5cm. Ink the edges and attach flat to white card.
Cut a flower pattern as pictured 10.5cm x 15.5cm. Ink edges and attach to yellow base.
Cut the greeting out, trim the outer edges and ink. Cut a yellow print to create a 0.5mm border around the greeting. I did cut a white mat initially to back the 2 patterns to help it stand out further but chose not to use it in the end.
Cut 1 flower and 1 leaf and create a set as pictured. Select 1 butterfly.
 
 
Cut the barcode strip of the same patterns from a 12x12 and trim a piece to 16.5cm. Lay it on a piece of lace, then on a 2cm strip of white card. Attach to the card 3cm up from the base.
Follow the photos to attach your other elements or create your own combinations.

 
Card 3.
 
 
Cut a yellow patterned base 11.5cm x 16.5cm. Ink the edges and attach flat to white card.
Cut a flower pattern as pictured 9.7cm x 14.5cm. Ink edges and attach to yellow base.
Cut out the greeting and cut a yellow print to create a 5mm border around the greeting. Cut a white panel to create a 3mm border around the yellow. Select 1 butterfly.
 
 
Follow the photos to attach your elements or create your own combinations.

 
The butterflies come as 2 halves which make it easy to attach without any creases through the middle.


Products used to complete this project:
 
Bohemian Bouquet collection
 
Art Deco Creations product
 
Thanks so much for looking and until next time, Happy Creating. K x


Tuesday, November 7, 2017

Bohemian Butterflies

Hello everyone and thankyou for joining with me again today. I have been playing with the Bohemian Bouquet again. One of the great aspects of this collection is the colour range and today I have used the blues as my base theme.
I have used one pack of the Blue Butterflies, one sheet of 12x12 paper and 1 sheet of the decoupage designs. Teamed with plain white cards and one of the gorgeous Bohemian Bouquet stamp sets, I found the strong shots of orange pink and green bursts give a clean and fresh look to this set of cards. I hope you enjoy. K x

 
I have used the Decoupage Die cut sheet, 1 12x12, the Blue Layered Butterflies and Stamp Set.
 
Card 1.
 
Fold one of your A6 cards in half.
Cut a strip, 4cm wide x 14.9cm high, from the reverse of the 12x12 and ink in a coordinating blue.
Attach to the card front 2cm in from the spine.
Pop the decoupage pieces from the sheet, trim around the edges to get a desired finish.
Arrange the pieces around the butterfly as you wish. Your options are endless.
Stamp the sentiment in the lower portion of the blue strip to balance. 


Card 2.
 
Fold one of your Tall cards in half.
Cut a panel from the print, 10.2cm wide x 21cm high. Ink in a coordinating blue & attach to the card.
Cut a smaller panel from the reverse, 5.5cm wide x 14.8cm high and ink the edges.
Cut a plain white panel to frame the print, 6cm x 15.3cm.
Pop the decoupage pieces from the sheet, trim around the edges to get a desired finish.
 
Attach the print to the white to create a white border and attach to the card using 3D.
Stamp the image using the picture as a guide. I had already roughly placed my decorative pieces in place to get an idea of where the sentiment would fit best.
 
Arrange the pieces around the butterfly as you wish. Again, your options are endless.


Card 3.
 
Fold one of your Tall cards in half. Tear down along the front edge, 3.5cm in from the spine, removing most of the front cover.
Cut a panel from the print, 10.7cm wide x 21.5cm high. Ink in a coordinating blue.
This will become the main portion of the new front cover. Attach it by securing behind the white flap, into the spine of the card.
You will then see the reverse of the panel when you open the card.
Cut a strip from the reverse panel to include the decorative barcode strip section which will give you another design element. Tear along the green edge to match the torn edge on the card, ink in blue and attach on the front white flap section.
 
Recycle the small rectangle print by using the packaging from the Butterflies. Cut a panel 5.5cm wide x 9.8cm high. Ink in a coordinating blue.
Cut a plain white panel to frame the recycled print, 6cm x 10.4cm. Attach the 2 pieces with a layer of 3D in between then attach flat to the card front as pictured.
 
 
Pop the decoupage pieces from the sheet, trim around the edges to get a desired finish and using the butterfly as your focus, arrange the pieces as you wish.

 
Products Used to complete this project:
 
Bohemian Bouquet Collection
 
Art Deco Creations
 
Until next time Happy Creating. K x